An oscilloscope is an indispensable tool for electronics enthusiasts, engineers, and technicians alike. Whether you’re diagnosing electrical issues, designing circuits, or troubleshooting signals, mastering the use of an oscilloscope can greatly enhance your productivity and effectiveness. In today’s post, we’re sharing some tips for making the most of your Tektronix oscilloscope and obtaining accurate, insightful measurements.
1) Understand Your Oscilloscope
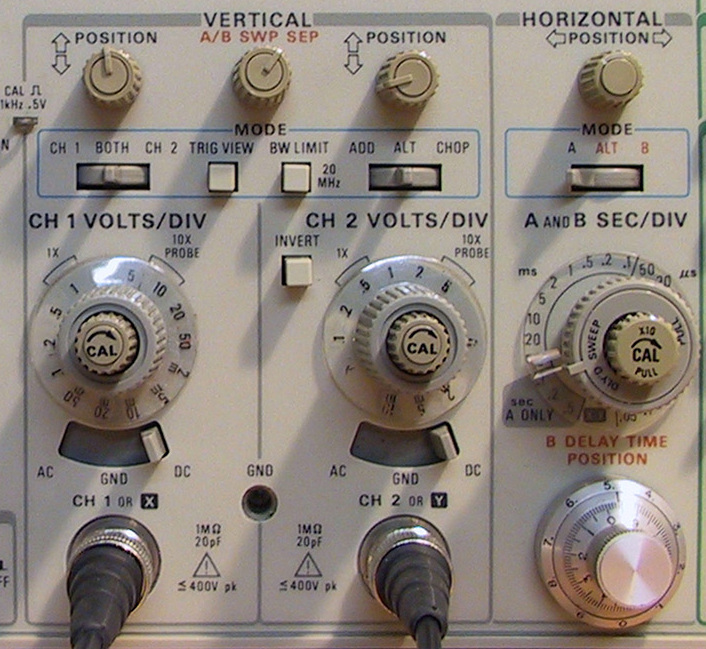
Before diving into measurements, take the time to thoroughly understand your oscilloscope’s features, controls, and specifications. Read the user manual and familiarize yourself with the instrument’s front panel, including knobs, buttons, and connectors. Different oscilloscopes may have varying capabilities, so knowing what yours can do is crucial.
2) Set Up Properly
• Calibration: Ensure your oscilloscope is calibrated regularly to maintain measurement accuracy. Most oscilloscopes provide an internal calibration routine for this purpose.
• Probe Selection: Choose the appropriate probe for your measurement. Different probes have different bandwidths and attenuation factors, so select one that matches your signal characteristics.
• Grounding: Connect the oscilloscope’s ground lead properly to avoid ground loop issues. The ground lead should be attached close to the measurement point.
3) Adjust Time and Voltage Scales
• Timebase Setting: Adjust the timebase to display an appropriate time span for your signal. Use a slower timebase for low-frequency signals and a faster timebase for high-frequency signals.
• Voltage Scale: Set the vertical scale (volts per division) to fit your signal within the screen’s vertical range. This ensures you see the waveform clearly and maximize the screen’s resolution.
4) Triggering
• Trigger Level: Set the trigger level to stabilize the waveform display. It helps the oscilloscope capture repetitive waveforms consistently. The trigger level should be adjusted until the waveform is steady.
• Trigger Mode: Select the appropriate trigger mode (edge, pulse width, video, etc.) that matches your signal type. Edge triggering is common for most signals, but other modes are valuable for specific applications.
5) Use Cursors and Measurements
• Cursors: Utilize cursor functions to measure signal parameters like voltage levels, time intervals, and frequency. Cursors make it easy to obtain accurate readings directly from the display.
• Automated Measurements: Many modern oscilloscopes offer automated measurement functions that can quickly calculate key parameters such as frequency, rise/fall time, and peak-to-peak voltage.

6) Save and Document
• Waveform Capture: Save waveforms or screenshots for future reference or reporting. Some oscilloscopes allow you to save data to a USB drive or connect to a computer for data storage and analysis.
• Documentation: Keep a log of your measurements, including setup details, observed waveforms, and any troubleshooting steps. Documentation is invaluable for future reference and problem-solving.
7) Experiment and Learn
• Experiment: Don’t hesitate to experiment with different oscilloscope settings and functions to gain a deeper understanding of your signals. This hands-on experience can lead to better troubleshooting and design skills.
• Continuous Learning: Stay updated with the latest oscilloscope techniques and technologies by reading user guides, attending workshops, and seeking online resources and tutorials.
Mastering the use of an oscilloscope requires a combination of knowledge, practice, and attention to detail. By following these tips and investing time in learning and experimentation, you’ll become proficient at using your oscilloscope effectively, enabling you to diagnose and troubleshoot electronic circuits with confidence.
Remember, an oscilloscope is a versatile tool that can greatly enhance your ability to work with electronics, so make the most of it in your projects and experiments. Happy measuring!